Deana Neibert
Welcome To Deana's Page
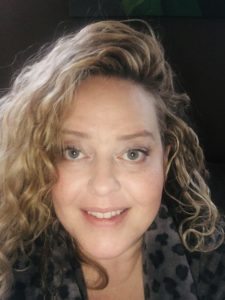
Deana Neibert, a native Oklahoman, spent the first 18 years of her adult life teaching theatre. In Oklahoma, she was the drama and stagecraft teacher at Edmond Memorial High School where she was a member of the International Thespian Society. While at EMHS, Deana directed over 30 plays and musicals. In 2010, her husband, Lee was offered a job as a theatre professor at USC Upstate. Deana then moved to South Carolina where she was the managing director of the Spartanburg Youth Theatre. Although Deana spent many hours designing and painting sets, making props, and sewing costumes, she decided to trade the stage for a paintbrush. In 2016, Deana decided that she was ready to study art full time and attended USC Upstate in order to become certified to teach art. Deana currently teaches art to children at the YMCA, in local schools as an Artist in Residence, and teaches privately. Deana also teaches art to special needs adults at USC Upstate. Deana’s latest artworks have been in shows at USC Upstate, The Chapman Cultural Center and The Kentucky Derby Museum. Deana is thrilled to join Whizkidme family and cannot wait for you to visit her classes.
Contact Me
Please log-in using your membership credentials to view contact form for contacting instructor
my Classes
class plan
Artapalooza | 4-8 | Drop-In - Spring Semester
Artapalooza | 9-14 | Progressive - Spring Semester
Artapalooza | 4-8 | Drop-In - Spring Semester
Week | Session Topic/Theme | Key Takeaways | Materials needed |
March 18 | Salt ‘n’ Water Wonders Dive into the world of art with Salt ‘n’ Water Wonders! Using only salt and water, we’ll create magical masterpieces, from swirling galaxies to shimmering seascapes. Join us for a splashing good time and let your imagination run wild! | 1. Explore how salt and water interact to create unique painting effects. 2. Experiment with blending colors using only salt and water. 3. Have fun expressing creativity through simple yet enchanting art techniques. | Supplies: Table salt Cup of water Paintbrush Dark colored paper (black, dark blue, etc. . .) |
March 28 | Handprint Bee Bonanza Get ready to create buzzing fun in Handprint Bee Bonanza! Using colorful paper and your handprint, we’ll craft adorable bees that will make your heart flutter. Let’s fly into imagination together and bring these cute critters to life with laughter and creativity! | 1. Learn how to create a bee using a handprint and paper. 2. Practice cutting and shaping paper to form bee wings and stripes. 3. Have fun expressing creativity while making a cute handprint bee craft. | Supplies: Colored paper Glue Scissors Pencils Black Marker |
April 4 | Grumpy Clouds Join us for a whimsical adventure in Paper Grumpy Cloud Color Rain! With just paper and crayons, we’ll turn plain clouds into cheerful rain showers of vibrant colors. Let your imagination soar as we craft our grumpy clouds and fill the sky with joy!
| 1. Learn how to create a grumpy cloud using paper. 2. Practice coloring techniques to add vibrant colors to the clouds. 3. Explore creativity by designing a cheerful rain shower with paper grumpy clouds. | White paper Watercolors Paintbrush Cup of water Paper Towels Scissors Glue Black marker |
April 11 | Jumpy Frogs Get ready to hop into fun with Paper Jumpy Frogs! Using paper and markers, we’ll bring these adorable amphibians to life with colorful designs. Let’s leap into creativity and create a ribbiting adventure together! | 1. Learn how to fold paper to create a simple frog shape. 2. Practice decorating the paper frogs with markers to add colorful details. 3. Explore imaginative play by making the paper frogs “jump” and creating froggy scenes. | Green paper (any color will do if your artist prefers a different color frog) Scissors Glue Markers or crayons |
April 18 | Ice Cream Blobs Get ready for a sweet treat in our Ice Cream Blob Bonanza! Using watercolors, glue, and scissors, we’ll craft deliciously adorable ice cream blobs that look good enough to eat. Let’s sprinkle some creativity and scoop up some fun together! | 1. Learn how to use watercolors to paint colorful blobs resembling ice cream scoops. 2. Practice using glue and scissors to assemble the paper blobs into ice cream cone shapes. 3. Explore creativity by decorating the ice cream blobs with fun designs and toppings. | White paper Watercolors Paintbrush Cup of water Paper Towels Scissors Glue Black marker |
April 25 | Paper Octopus Extravaganza Dive into the depths of creativity with Paper Octopus Extravaganza! Using paper, scissors, and markers, we’ll craft adorable octopuses with wiggly tentacles and colorful personalities. Let’s embark on an underwater adventure and bring these eight-legged wonders to life with laughter and imagination! | 1. Learn how to fold and cut paper to create the shape of an octopus. 2. Practice using markers to add details and personality to the paper octopus. 3. Explore creativity by experimenting with different colors and patterns to make each octopus unique. | Supplies: Colored paper Glue Scissors Markers, colored pencils or crayons |
May 2 | Ring Pop Delight Indulge in sweet creativity with our Paper Ring Pop Delight class! Using paper and colorful markers, we’ll sketch and color our own versions of the famous Ring Pop sucker, complete with sparkling gemstones and vibrant swirls. Let’s satisfy our artistic cravings and create mouthwatering masterpieces that sparkle and shine! | 1. Learn how to sketch the shape of a Ring Pop sucker using paper and markers. 2. Practice adding colorful details such as swirls and gemstones to make the Ring Pop design pop. 3. Explore creativity by customizing each Ring Pop with unique colors and decorations. | White paper Pencil and eraser Color makers of your choice (crayons, markers, colored pencils, watercolors, etc) |
May 9 | Tissue Paper Flowers Immerse yourself in the beauty of nature with our Tissue Paper Flower Fiesta! Using only tissue paper and glue, we’ll channel our inner Georgia O’Keeffe and create stunning floral masterpieces inspired by her iconic paintings. Let’s blossom with creativity as we craft delicate petals and vibrant blooms that capture the essence of springtime! | 1. Learn how to manipulate tissue paper to create various shapes resembling petals and blooms. 2. Practice using glue to assemble the tissue paper pieces into floral arrangements inspired by Georgie O’Keeffe’s paintings. 3. Explore artistic expression by experimenting with color combinations and textures to evoke the beauty of flowers in our creations. | White paper Tissue paper Glue (white runny glue is preferred) Scissors |
May 16 | Toilet Paper Roll Dino Derby Roar into prehistoric fun with our Toilet Paper Roll Dino Derby! Using toilet paper rolls, paint, and googly eyes, we’ll transform ordinary cardboard into adorable dinosaurs that will stomp their way into your heart. Let’s embark on a Jurassic journey together and unleash our creativity as we bring these ancient creatures back to life! | 1. Learn how to repurpose a toilet paper roll to create the body of a dinosaur. 2. Practice painting techniques to add color and details to the dinosaur’s body. 3. Explore creativity by adding googly eyes and other decorations to give each dinosaur its own unique personality. | Supplies: Colored paper An empty toilet paper roll Scissors Glue Markers, colored pencils or crayons Pencil and eraser |
May 23 | Talking Tiger Tale Get ready to unleash the roar of creativity with our Talking Tiger Tale! Using paper, scissors, and imagination, we’ll craft charming talking tigers that will bring jungle magic to life. Let’s embark on a wild adventure together as we create these ferociously fun felines that are sure to steal the spotlight! | 1. Learn how to fold and cut paper to create the shape of a tiger’s head. 2. Practice adding details such as stripes and facial features using paper cutouts. 3. Explore creativity by designing and assembling a talking tiger puppet that can be animated to tell stories or interact with others. | White paper Pencil and eraser Color makers (colored pencils, crayons, etc.) Scissors Glue |
May 30 | Little Art Book Get ready to embark on a miniature artistic adventure with our Little Art Book Bonanza! Using paper, scissors, and markers, we’ll craft adorable little art books that are perfect for doodles, sketches, or tiny masterpieces. Let’s shrink down our creativity and create pint-sized treasures that will spark big imaginations! | 1. Learn how to fold and cut paper to create small booklets or pamphlets. 2. Practice using markers or other art supplies to decorate the covers and pages of the art books. 3. Explore creativity by filling the pages of the little art books with drawings, doodles, or short stories, allowing personal expression to flourish within the tiny confines of each booklet. | Supplies White paper Scissors Color Makers of your choice (crayons, colored pencils, etc) Pencil and Eraser |
Artapalooza | 9-14 | Progressive - Spring Semester
Week | Session Topic/Theme | Course Structure Students will do & learn: | Materials needed |
March27 | Disco Balls Let’s groove into the world of glitter and glamour with our Disco Ball Delight class! Using paper, pencils, and shiny markers, we’ll draw and color our own dazzling disco balls that capture the essence of disco fever. Get ready to shine bright as we create sparkly masterpieces that are sure to light up the dance floor! | 1. Learn how to sketch the spherical shape of a disco ball, understanding the reflection and refraction of light to create a realistic appearance. 2. Practice using shiny markers or metallic pencils to add vibrant colors and highlights that mimic the sparkling effect of a disco ball. 3. Explore creativity by experimenting with different patterns and designs to decorate the disco ball, allowing students to personalize their creations with flair and style. | White paper Black sharpie Markers (neon or metallic markers would be fabulous) |
April 3 & 10 | Art Journals Get ready to begin a creative journey with our Art Journal Adventure! Using paper, markers, and your imagination, we’ll craft personalized art journals that serve as a canvas for self-expression. Let’s fill the pages with colorful drawings, inspiring quotes, and heartfelt reflections as we document our thoughts, dreams, and experiences in these unique and treasured keepsakes. Get ready to unleash your creativity and embark on an artistic adventure that’s as unique as you are! | 1. Learn how to assemble and bind paper into a journal format, exploring different techniques such as folding, cutting, and stitching. 2. Practice using markers and other art supplies to decorate the pages of the art journal, experimenting with various styles, themes, and techniques. 3. Explore creativity by expressing thoughts, feelings, and ideas through drawings, writings, collages, and other artistic elements within the art journal, allowing for personal reflection and self-expression. | A sketchbook, spiral notebook, 3 ring binder Paper Magazine cut outs, pictures, quotes, etc. Color makers Pens Pencil and eraser Scissors |
April 17 & 24 | Aluminum Foil Relief Let’s embark on a tactile art adventure with our Aluminum Foil Relief Rendezvous! Using aluminum foil and everyday objects, we’ll create stunning relief sculptures that leap off the canvas. Get ready to explore texture, shape, and form as we mold and shape our masterpieces into three-dimensional works of art! |
2. Practice using various tools and techniques to emboss, sculpt, and shape the aluminum foil into relief sculptures, exploring depth and dimensionality. 3. Explore creativity by experimenting with different subjects and themes for the relief sculptures, encouraging students to express themselves artistically through their unique creations. | Supplies: Aluminum foil Elmers white glue Colored sharpies 1 piece of cardboard that is at least 8.5 X 11 |
May 1 & 8 | Cardboard Landscapes Let’s embark on a scenic journey with our Paper Collage Landscapes class! Using only paper and colorful markers, we’ll piece together stunning landscapes that capture the beauty of nature. Get ready to explore texture, composition, and perspective as we create our own picturesque vistas in this artistic adventure! | 1. Learn how to cut and layer paper to create different elements of a landscape, such as mountains, trees, and clouds. 2. Practice using colorful markers to add details and highlights to the paper collage, enhancing the depth and vibrancy of the landscape. 3. Explore creativity by experimenting with composition and arrangement of the paper elements to create unique and visually appealing landscapes, allowing students to express their artistic vision. | Cardboard pieces Glue (Elmer’s White) Scissors Color makers of your choice (paints, markers, etc) |
May 15 & 22 | Tunnel Books Dive into the fascinating world of tunnel books with our Tunnel Book Trek! Using paper, scissors, and creativity, we’ll construct captivating tunnel books that transport viewers into immersive three-dimensional scenes. Let’s embark on an artistic journey together as we explore perspective, storytelling, and the magic of depth in these unique and mesmerizing artworks!
| 1. Learn how to assemble layers of paper to create the structure of a tunnel book, understanding the principles of perspective and depth perception. 2. Practice using scissors and precision cutting techniques to craft intricate details and shapes for the scenes within the tunnel book. 3. Explore storytelling and visual narrative by designing and arranging the elements within the tunnel book to create immersive three-dimensional scenes that engage and captivate viewers. | White heavy paper or cardstock (5 or more sheets) Pencil and eraser Ruler Scissors Glue Color makers of your choice |
May 29 | Cross Hatch Cities Let’s build our own bustling metropolises with our Cross-Hatch City Project! Using paper, pens, and your architectural imagination, we’ll sketch intricate cityscapes filled with skyscrapers, streets, and bridges. Get ready to explore perspective, depth, and urban design as we create dynamic and vibrant cities that leap off the page! | 1. Learn how to use cross-hatching techniques with pens to create shading and texture in architectural drawings, understanding how to represent light and shadow on buildings and streets. 2. Practice sketching different elements of a cityscape, such as buildings, roads, bridges, and landmarks, experimenting with perspective and composition to create depth and dimension. 3. Explore creativity by designing unique and imaginative cityscapes, incorporating elements of fantasy or realism to create dynamic and visually compelling urban landscapes. | Paper Pens or fine-tip markers (black or dark colors for cross-hatching) Pencils Eraser Ruler |
Using The Class Plan
Please Note: Both Age Groups (if applicable) will follow the same class plan structure and content. The content delivery will be tailored to the age group.